Mobirise

Install Linux on a Lumia 950/950XL


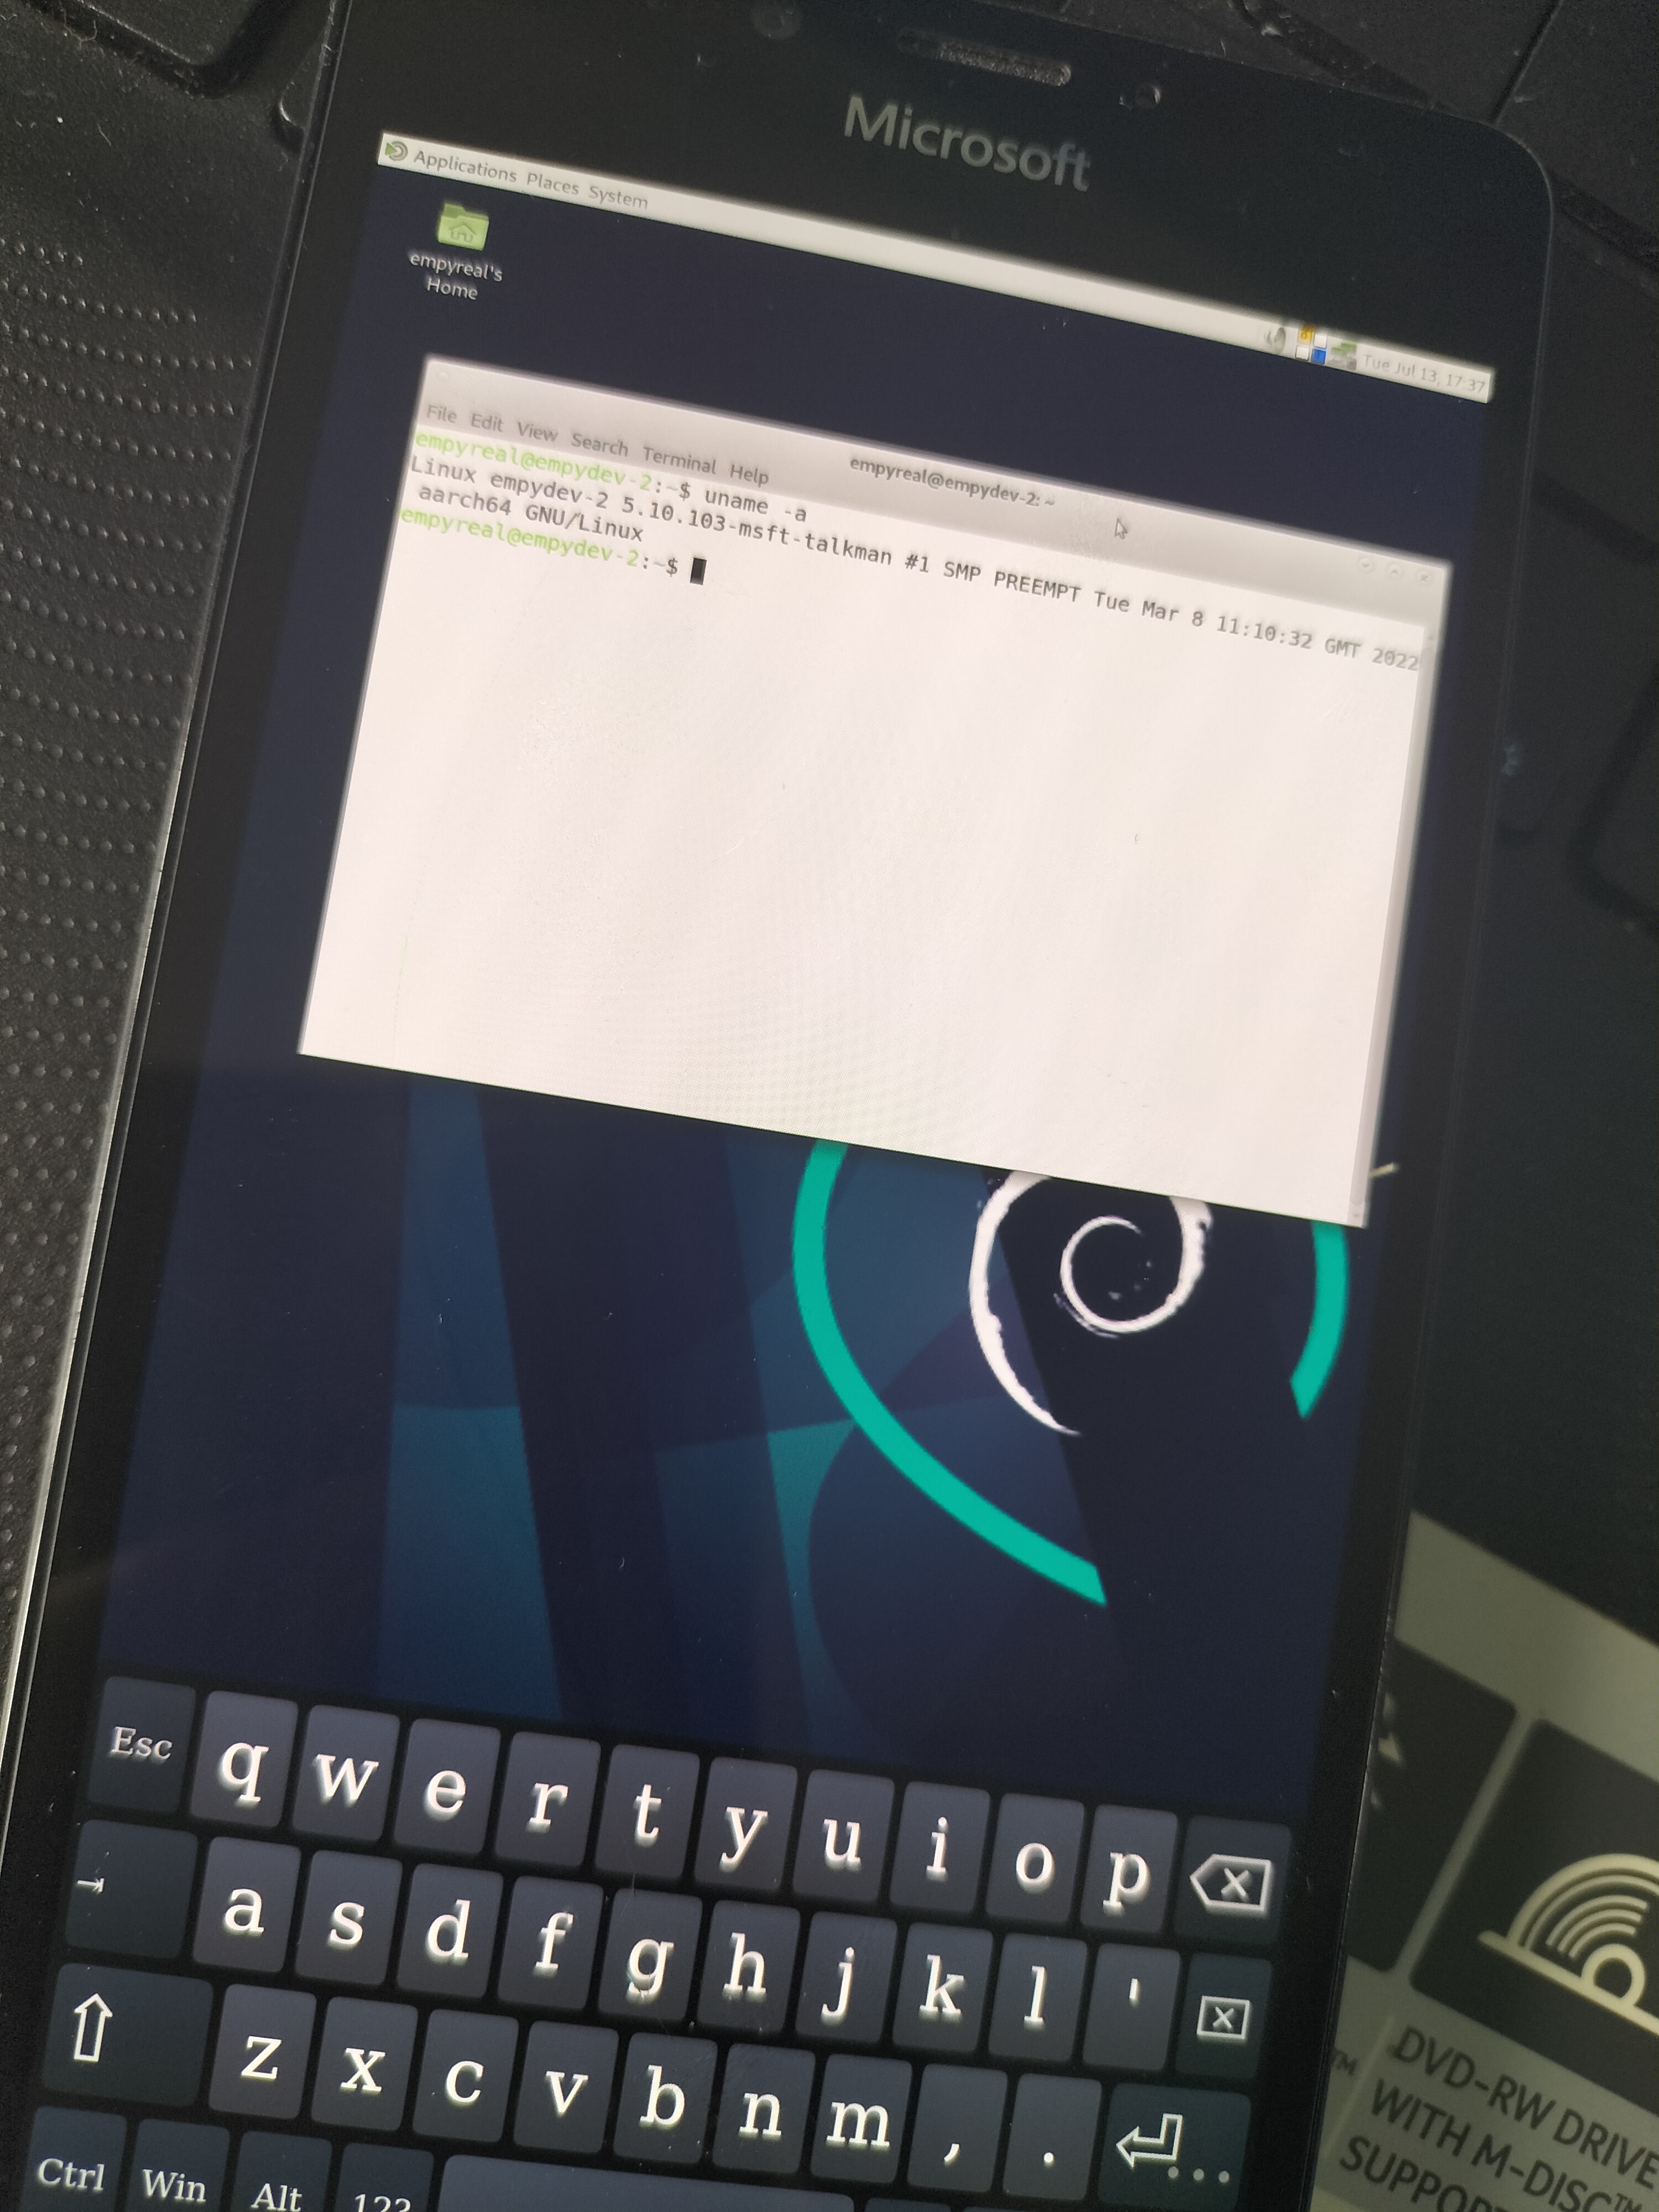
If all goes to plan, this guide will let you compile the Linux Kernel and deploy an Ubuntu based distro to your 950/XL as a "proof of concept"

Notes:
- Basically no HW is working yet
- There are likely better ways, but this I find is the "simplest" way to set up Linux for people starting out new
- Recommended to make a full disk backup of your phone if this is your first time.

Requirements:
- An Ubuntu based distro installed in either a VM or native boot (WSL will NOT work for Kernel Compilation)
- Unlockable Bootloader
- Prior knowledge of using WOA Deployer Lumia to set up device partitions (This guide replaces the "Windows" partition on the device. I have no affiliation with WOA Project)


Required Files

- A Kernel Tarball Package from Kernel.org (If you prefer to use git, you can clone the branch that way)

- Aarch64 boot files: bootaa64.efi and grub.cfg

- MSM8994/8992 defconfig for the Kernel (You can use a different one if you have it)


Getting Started

Update Apt and installing dependencies

Open the Terminal app on your PC and type:

          $ sudo apt update
            sudo apt install build-essentials crossbuild-essential-arm64 flex bison qemu-user-static debootstrap binfmt-support gparted

Extract Kernel source and copy Lumia defconfig

Navigate in the terminal to the folder where you downloaded files (linux-5.16 used as example):

          $ cd ~/Downloads
            tar -xvf linux-5.16.14.tar.xz
            cp lumia_defconfig linux-5.16.14/.config

Build the Kernel and save the files for later

Navigate to the "linux-5.16.14" and check config file loads, and build.

          $ cd linux-5.16.14/
            make ARCH=arm64 CROSS_COMPILE=/usr/bin/aarch64-linux-gnu- menuconfig


When the menu appears, click Right Arrow on keyboard, Click Enter on "Exit", then:

          $ make ARCH=arm64 CROSS_COMPILE=/usr/bin/aarch64-linux-gnu- deb-pkg


When that is finished, check the folder that contains our "linux-5.16.14/" folder. You should see 4 new .deb files, these we keep for later! 

Prepare your 950/XL in Mass Storage Mode

It's expected that your device is already Bootloader Unlocked, and Windows 10 ARM is already deployed (Removing WP recommended)

(Note: It is not essential to deploy WoA, if you know how to setup the uefi and bootshim manually, do so if you wish. you can also cancel WoA Deployment as it starts writing the Image to phone. just make sure Developer Menu gets installed and Partitions are configured.)


The below is going from an Unlocked 950, WoA installed with Developer Menu and Windows Mobile removed:

          - Boot to Mass Storage Mode and connect to you Linux Machine.
          - Open GParted, select your Phone Storage. Examples:

If your machine has 1 SSD only, the phone will be seen as "/dev/sdb"
If your machine has 2 SSDs, the phone will be seen as "/dev/sdc"

          - Locate and remember your "Windows" labeled partition on the phone, usually the last partition (We will use /dev/sdb43)
          - Locate and remember your "SYSTEM" labeled partition on the phone, usually 2 before "Windows" (We will use /dev/sdb41) 
          - Select and Format "Windows" /dev/sdb43 to ext4.  !DO NOT FORMAT ANYTHING OTHER THAN THE WINDOWS PARTITION!


Open Terminal and create folders to Mount the newly created ext4 partition, and SYSTEM partition:

          $ sudo mkdir /mnt/root
            sudo mkdir /mnt/boot
            sudo mount /dev/sdb43 /mnt/root
            sudo mount /dev/sdb41 /mnt/boot

Keep Terminal open.

Deploy Ubuntu to the Phone and copying the Kernel files

Now we need to start installing Ubuntu and configure the new install using chroot access, if an issue happens, delete the contents of /mnt/root and start again

Type into the Terminal the following to start the download and install:

          $ sudo qemu-debootstrap --arch=arm64 stable /mnt/root

(This will take a few minutes)
When that process is finished, we need to copy our compiled kernel files to /mnt/root:
(Your output names will be different, don't copy the .deb with "_dbg" in the name)
(msm8992-msft-lumia-octagon-talkman.dtb is for my 950 which is in 5.16.14, replace talkman with cityman for XL)

          $ cp ~/Downloads/linux-image-5.16.14-msft_talkman-1_arm64.deb /mnt/root
            cp ~/Downloads/linux-libc-dev-5.16.14-msft_talkman-1_arm64.deb /mnt/root
            cp ~/Downloads/linux-headers-5.16.14-msft_talkman-1_arm64.deb /mnt/root
            cp ~/Downloads/linux-5.16.14/arch/arm64/boot/dts/qcom/msm8992-msft-lumia-octagon-talkman.dtb /mnt/root/boot


Keep Terminal open.

Configuring the new install

Now we need to setup a user account and install the kernel and some packages and a usable UI, first we "chroot" into the system:

          $ sudo chroot /mnt/root

This will load the root shell of the new arm64 install, type to install some needed packages:

          # apt update
            apt install initramfs-tools sudo nano onboard locales tasksel


Now time to install the Kernel

          # dpkg -i /*.deb


Installing the Desktop Environment, type in the terminal to load the options

          # tasksel


Here you can choose your DE (Gnome, LXDE, Xfce etc). For this guide we choose MATE which is LightDM based

          - Select Mate Desktop Environment with spacebar, press Enter to accept.
          (If you receive an apt-get error, re-run the "tasksel" command)


Creating and adding a user to sudoers group. For this example I use "empy", replace with your desired username

          # adduser empy
            usermod -aG sudo empy


Configuring MATE by enabling auto login, Open the config file and modify under [Seat:*] section:

          # nano /etc/lightdm/lightdm.conf

(Below will be empty or commented out, modify to match these settings, replacing "empy" with your username you made previously. Press Ctrl + X then press Y to save)

           pam-service=lightdm
           pam-autologin-service=lightdm-autologin
           autologin-user=empy
           autologin-user-timeout=0
           session-wrapper=/etc/X11/Xsession
           greeter-session=lightdm-greeter


Exit the chroot for now keeping terminal open, type:

          # exit

Making the Installation bootable

Now we need to modify the "grub.cfg" file we downloaded, and then copy the boot files to SYSTEM partition mounted earlier.

If your ext4 partition and SYSTEM partition are different to this guide, you need to modify to fit your needs.
If vmlinuz, initrd and device tree have different names, please modify as needed.


Open "grub.cfg", and make sure all is correct:


          set timeout=07

          menuentry "Linux" {
               set background_color=black
               insmod part_msdos
               insmod ext2

               set root=(hd0,gpt43)
               linux /boot/vmlinuz-5.16.14-msft-talkman root=/dev/mmcblk0p43 acpi=no rw
               initrd /boot/initrd.img-5.16.14-msft-talkman

               devicetree /boot/msm8992-msft-lumia-octagon-talkman.dtb

               }


Now copy the boot files to SYSTEM, the unmount all mounted partitions on the phone, type in Terminal:

          $ sudo cp ~/Downloads/bootaa64.efi /mnt/boot/EFI/boot
            sudo cp ~/Downloads/grub.cfg /mnt/boot/EFI/boot
            sudo umount /dev/sdb*


You are now finished! Unplug and reboot the Phone, In theory you should be able to load Linux :)


Notes, Acknowledgments and Credits

- Credit to original owners of any tools or files provided, I have no affiliation to anyone org or person.
- It is possible to get Bluetooth Networking running on XL models, I will add this to the guide at a later date.
- If you are interested in helping compatibility for HW, interested in installing on other Lumia devices etc then visit the Mainline4Lumia group (No affiliation just a friendly suggestion)

Made with ‌

Landing Page Software